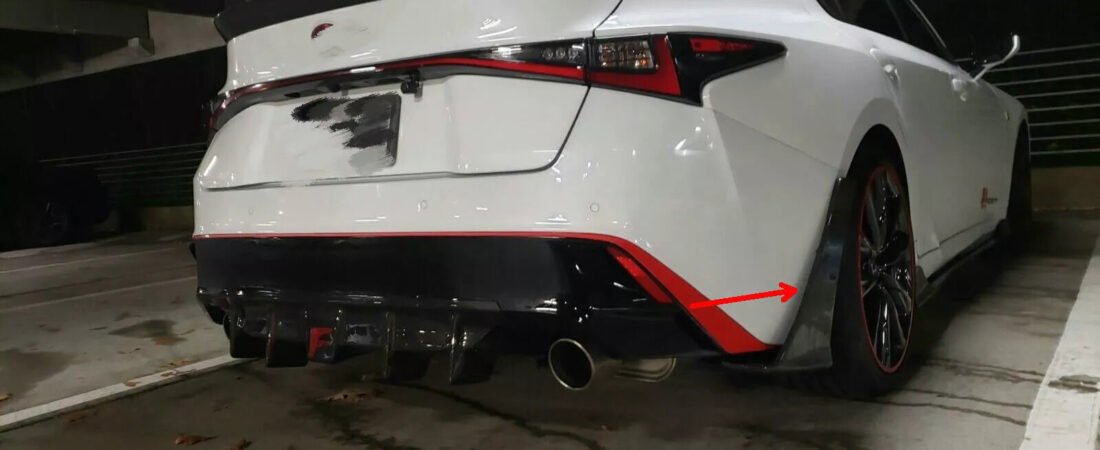
Carbon fiber canards are small bumper-mounted pieces, also called dive planes. They can make a front or rear corner look more purposeful, but they are easy to misalign, mount on the wrong bumper or position too close to a lamp, sensor or tire. The expensive mistake is drilling first and checking fitment later.
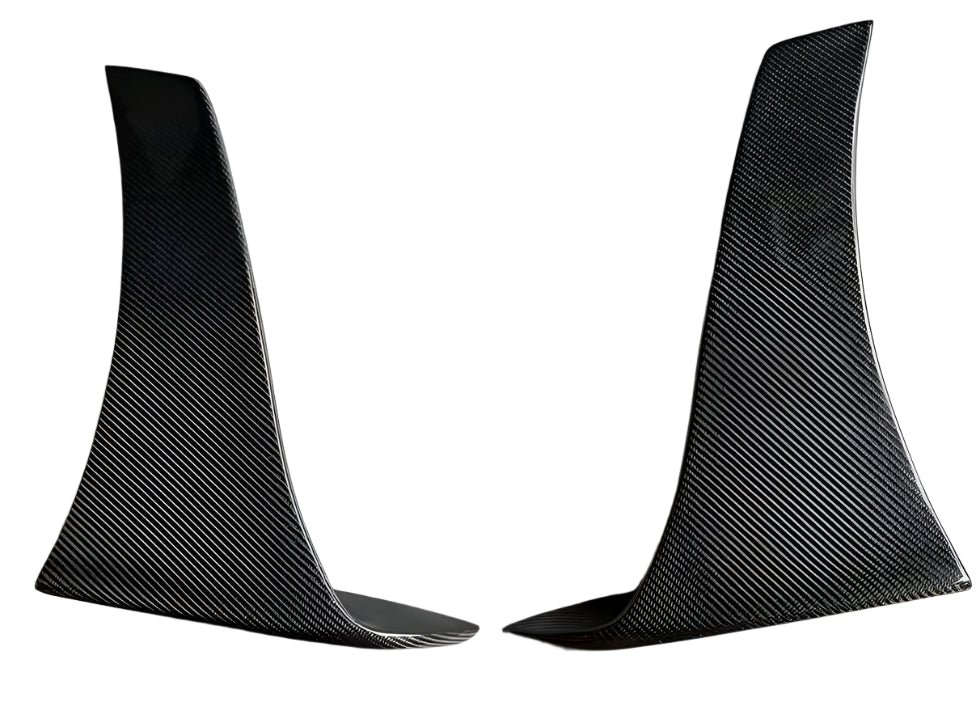
This guide gives you seven checks to make before ordering or installing a set. The six photographs are real RevexaAuto catalog images of installed parts. Each caption links to its vehicle-specific application; they are visual references, not evidence that the same shape fits a different bumper.

The 60-second answer
Match the exact year, bumper generation, trim and front or rear position before choosing a style. Ask whether the kit contains two or four pieces and whether it needs drilling, adhesive or both. Test-fit the left and right sides together, measure from fixed bumper features and confirm that lamps, reflectors, cameras, sensors, tow-hook access and tires remain clear. Treat any aerodynamic benefit as product-specific: without engineering or test data for the complete vehicle, buy on verified fit, construction and appearance—not a downforce number.
What are canards, and what should buyers expect?
Canards are small vanes fitted near bumper corners. On an engineered vehicle package, their angle and position can influence the local airflow. On many street cars, they are primarily a styling choice. A functional result depends on the complete nose, ride height, underbody, speed range and mounting; a catalog photo does not prove a measurable performance gain.
Front canards, rear bumper canards and universal winglets are different products. Vehicle-specific parts should follow a known bumper contour. Universal pieces require more installer judgment and may need custom positioning or backing. Ask the seller which category you are buying before you compare price.
7 carbon fiber canards fitment mistakes to avoid
1. Matching the model but missing the bumper generation
Automakers change bumper covers between generations, facelifts, sport trims, track packages and regional versions. A canard listed for the correct model name may still cross a different vent, fog-light bezel or character line. Aftermarket bumpers introduce another mold and another set of curves.
Send the seller front-on, low-angle and both-corner photos. Include the year, chassis, trim, factory or aftermarket bumper and any front lip. Ask for an installed photograph on the same bumper—not merely the same badge. SAE’s collision dimensional reference guidance illustrates why consistent measurement points matter; for a buyer, fixed grille, seam and wheel-arch references are more reliable than judging from a thumbnail.

2. Confusing front, rear and universal pieces
A front-left canard is not automatically usable on the rear-right corner. Mounting faces, angles and body lines differ. Listings may use loose names such as winglets, fins, bumper blades or side canards, so confirm the intended corner and side.
Also confirm the quantity. Some kits include one piece per side; others stack upper and lower vanes. Ask whether the parts are labeled left and right, whether a positioning template is included and whether the photograph shows every piece in the quoted price.
3. Choosing drilling or adhesive without checking the load path
Drilling creates a defined mechanical attachment but permanently changes the bumper. Before making a hole, check what sits behind the cover: wiring, washer reservoirs, ducts, brackets and sensor harnesses. Thin bumper plastic may need a specified washer, nut, insert or backing method rather than a random screw.
Adhesive mounting avoids holes but needs enough clean, compatible and relatively flat tape land. 3M’s VHB tape application guidance explains the importance of surface preparation, application pressure and choosing the right product. It does not mean every canard can be installed with tape. Follow the instructions for the exact part and do not replace specified hardware with household adhesive.

4. Drilling before both sides are symmetrical
A small height or angle difference is obvious from the front of the car. Once holes are drilled, correction can require filling and repainting the bumper. Work on level ground with the steering straight. Temporarily position both sides, then measure from the same grille edge, bumper seam, lip or wheel-arch feature.
- Clean and dry the mounting area.
- Place both canards with removable painter’s tape.
- Measure height, angle and distance from fixed features.
- Check the car from standing height, low height and both corners.
- Confirm lamp, reflector, camera, sensor and tow-hook clearance.
- Mark final positions before drilling or exposing adhesive.
Do not force a warped part to match the bumper with fasteners. Uneven stress can crack a mounting face or pull one side out of alignment.
5. Ignoring weave, finish and actual construction
Compare left and right weave direction before installation. Ask whether the pair is visually matched and whether the finish is gloss, satin, matte or a forged-carbon style. If the car already has a carbon hood, splitter or mirror caps, compare those parts in daylight; a different clear-coat tone can be more noticeable than a different weave size.
“Carbon fiber” may mean full carbon composite, carbon over another substrate, a carbon skin or a printed carbon-look part. Toray’s overview of carbon-fiber processing routes shows why one material label can cover different manufacturing methods. Ask for the construction, backside photograph, finished weight and edge details of the actual product.

6. Forgetting tire, driveway and service clearance
Canards sit at exposed bumper corners. Check steep driveways, parking stops, trailer ramps and automatic car-wash equipment. Turn the steering fully in both directions and inspect the distance to the tire, especially if the car uses wider tires, spacers or a lower ride height. Suspension movement can reduce a gap that looks safe while parked.
If the vehicle must be raised for inspection, use the manufacturer’s lifting points and trained lift practice. The Automotive Lift Institute’s lift safety guidance emphasizes correct equipment, load capacity, positioning and operator training. A generic blog is not a substitute for the lift and vehicle instructions.
Keep tow-hook covers, lower fasteners and service panels accessible. A small part should not turn routine bumper or undertray service into a removal-and-rebond job unless that tradeoff is understood.
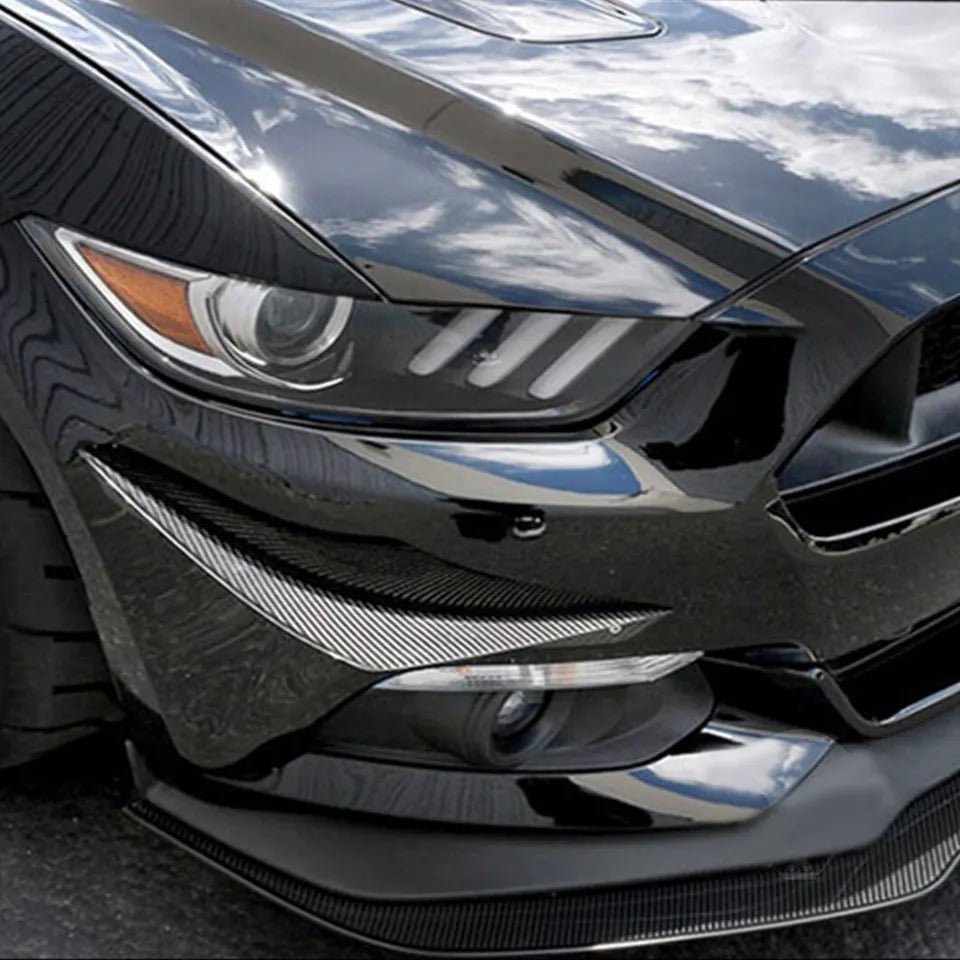
7. Assuming “street legal” without checking visibility and local rules
Do not position an accessory over a required lamp, reflector, license plate, camera or sensor. NHTSA has explained that additional equipment must not impair required lighting effectiveness in its Standard No. 108 interpretation. The current rule text is available in 49 CFR §571.108. Those sources do not certify a particular canard installation; they show why placement must be evaluated on the actual vehicle.
State and local requirements can differ. SEMA’s government-affairs resource overview points enthusiasts toward policy information, but you should still check the law and inspection rules where the vehicle is registered and driven. Avoid sharp projections and casual “legal everywhere” claims that the seller cannot support.
Canard mounting methods compared
| Method | Advantage | Critical check |
|---|---|---|
| Mechanical fasteners | Defined attachment and inspectable hardware | Correct backing, hole location and clearance behind the bumper |
| Automotive attachment tape | No drilled holes when the design allows it | Compatible surface, adequate tape land, preparation and cure conditions |
| Combined tape and hardware | Tape can seat the part while hardware provides retention | Use only the part maker’s specified method; do not improvise the load path |
| Universal custom fit | More freedom in style and placement | Installer must create symmetry, clearance and a safe mounting plan |
Inspect the canards before they touch the car
Unpack the left and right pieces together and compare them under daylight. The pair should mirror one another in overall shape, mounting-face angle and visible finish. Look for cloudy clear coat, pinholes, exposed fibers, rough edges, distortion or a left-right weave mismatch. Put the pieces on a flat protected surface and confirm they do not rock because of a warped mounting face.
Next, compare the supplied hardware and instructions with the part. A kit that requires drilling should identify hole locations or provide a template. A tape-mounted kit should provide enough continuous bonding area for the specified adhesive. If the seller supplies no mounting plan, send photographs before improvising; a replacement bumper costs far more than a short clarification.
During dry fitment, check the complete car rather than one corner at a time:
- Place both sides before marking either side permanently.
- Confirm the part follows the bumper without force or a visible gap.
- Turn the steering from lock to lock and recheck tire clearance.
- View lamps, reflectors, cameras and sensors from their working angles.
- Open tow-hook covers or service panels that must remain usable.
- Photograph the final temporary position so the installer has a reference.
What does the complete installed cost include?
Add the canards, freight, protective packaging, applicable import charges, removal of inner liners or bumper sections, dry fitment, marking, drilling, backing hardware, adhesive preparation and labor. Include paint repair if the bumper has existing damage or if a previous universal part left holes in the wrong place.
Ask how a confirmed fitment problem is handled before drilling. A useful seller policy distinguishes a wrong application from normal hand fitting and explains what photographs or measurements are needed. A slightly higher-priced vehicle-specific kit with clear instructions and complete hardware may cost less to install than a universal part that needs hours of positioning and fabrication.
Frequently asked questions
Do carbon fiber canards add downforce?
Do not assume a measurable gain. Aerodynamic effect depends on the vehicle, shape, position, angle, speed and the rest of the aero package. Look for product-specific engineering or test data before repeating a performance number.
Can canards be installed without drilling?
Sometimes, when the part was designed for adhesive mounting and the bumper provides enough compatible bonding area. Follow the part and adhesive instructions. A tape-only method is not appropriate simply because the part is small.
Are front and rear bumper canards interchangeable?
No. The mounting face, curve and orientation usually differ. Confirm front or rear position, left and right sides and the number of pieces in the kit.
Should I install them myself?
A careful owner may handle a simple documented fitment, but drilling leaves little room for error. Use a qualified shop when the bumper is expensive, repaired, sensor-equipped or difficult to access.
Send this before requesting a quote
- Year, make, model, chassis and trim
- Factory or aftermarket bumper, including its exact version
- Front, rear or both positions requested
- Front-on, low-angle and both-corner photographs
- Existing lip, splitter, body kit, sensors, cameras and tow-hook cover
- Ride height, wheel offset, spacers and tire size if modified
- Preferred two-piece or four-piece style
- Construction, weave direction and finish preference
- Street, show or track use and delivery country
- Quantity, wholesale or private-label requirements
Request a canard fitment review with those details. You can also compare the surrounding bumper setup in our carbon fiber front lip guide. The best set is the one that follows your exact bumper, stays clear of the car’s equipment and arrives with a mounting plan you understand before the first hole is made.