A carbon fiber front lip can make the nose of a car look lower and more purposeful. It is also one of the easiest exterior parts to scrape, misalign or attach with the wrong hardware. The expensive mistake is buying from a flattering front three-quarter photograph without checking the exact bumper, ground clearance and underside mounting area.
This guide gives you ten checks to make before ordering. The six photographs below are real installed-car images from the RevexaAuto catalog. Each caption links to the corresponding application; they show what a fitted part looks like on that vehicle, not a promise that the same shape will fit a different bumper.
The 60-second answer
First confirm your vehicle’s generation, model year, bumper style and any factory aero package. Then establish whether the listing is a cosmetic lip, a full-width splitter, a three-piece kit or a replacement lower bumper section. Measure the present lowest point and the approach angle at the routes you actually drive. Request an underside photograph, a parts list and written mounting instructions. Dry-fit the whole assembly before drilling, bonding or finishing it.
Front lip vs splitter: what are you actually buying?
A front lip usually follows the lower bumper’s visible contour and may add a modest forward edge. A functional front splitter is a more substantial horizontal surface extending forward beneath the bumper. Many product names mix the terms, so judge the design and mounting structure rather than the label. A multi-piece lip can have a center section and corner extensions; a one-piece part arrives as a continuous span. A replacement bumper or lower valance is a different installation again.
A well-developed splitter can change the pressure difference above and below the nose. Verus Engineering’s adjustable splitter documentation explains its specific design, support rods and aerodynamic intent. That does not mean every decorative carbon lip produces measurable downforce. Without product-specific testing, describe the visual result and avoid claiming a performance figure.
| Product | Main purpose | Critical evidence |
|---|---|---|
| Contour-following lip | Visible lower-bumper styling | Exact bumper profile, edge shape and attachment points |
| Three-piece lip | Modular styling and shipping | Joint alignment, center-to-corner fit and all included pieces |
| Functional splitter | Designed aero surface | Load path, supports, installation documents and testing |
| Replacement lower section | Changes the original lower bumper part | Original-part removal, tabs, sensor and grille interfaces |
10 carbon fiber front lip checks before you buy
1. Match the bumper, not just the model name
“Fits Lexus IS” or “fits BMW M3” is too broad. Sport, non-sport, facelift and special-edition bumpers may differ even within one model year. Aftermarket bumpers can change the lower contour again. Send the seller the make, model, year, chassis code, trim and photos directly facing the front bumper plus both lower corners. Ask them to confirm the specific bumper shown, not merely the vehicle badge.
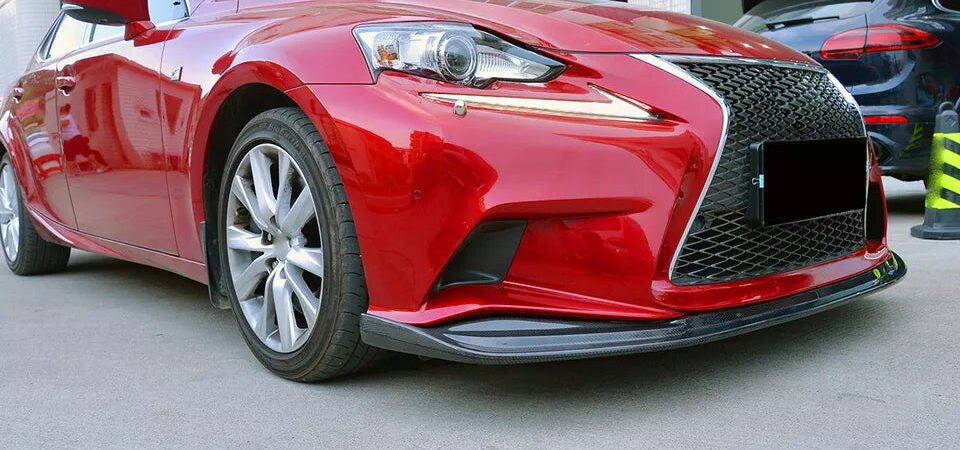
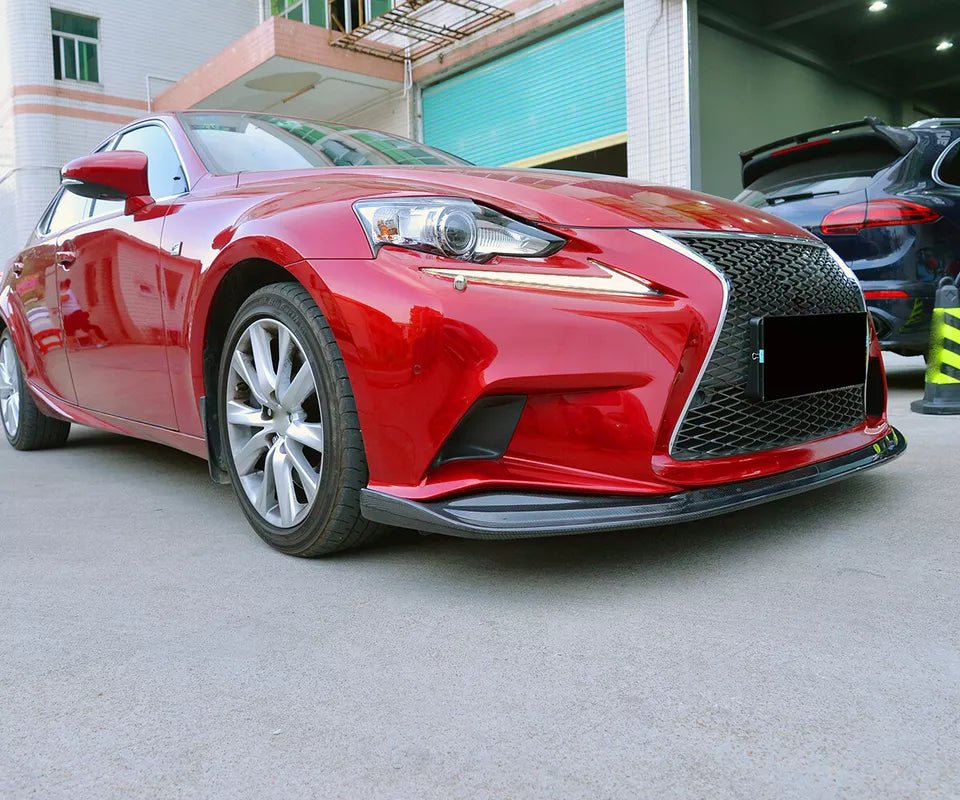
The red Lexus below illustrates why this matters: the lip follows the front face and turns upward at the corners. If your bumper has a different lower grille or corner opening, the part can look close in a catalog thumbnail yet leave a visible gap in person. Browse the front lips and splitters collection by vehicle, then verify the exact listing before ordering.
2. Identify every piece in the box
Ask whether the price covers a center lip only, two corner extensions, a full three-piece set, undertray panels, brackets, fasteners and support rods. A product photo may show a complete installed kit even when the listing is for one piece. Request a photograph of the uninstalled kit laid out on the floor. This also lets you inspect left-right symmetry and the way adjoining edges meet.

3. Measure clearance on the route you actually drive
Measure from level ground to the lowest point of the current bumper and to the point where the new lip is expected to sit. Also note how far it projects forward. A longer overhang can touch a driveway or ramp before its lowest point reaches the obstacle. Check your steepest driveway, parking-garage transition and loading approach. If you use a lowered suspension or larger tire, provide those details with the inquiry.
Do not use another owner’s ground-clearance number as your own. Tire diameter, ride height, load and bumper variant all change the answer. A front lip that survives ordinary roads on one car may scrape every day on a lower car with the same body style.
4. Inspect the underside mounting area
Request photographs of the lip’s rear and underside. Compare its hole positions, tabs and contact surfaces with the lower bumper and undertray on your vehicle. Confirm whether factory holes are reused or new holes are required. If the existing lower bumper is damaged or poorly aligned, fix that first; fastening a stiff new part to a distorted base can create uneven gaps and stress concentrations.
Do not assume double-sided tape is enough for a forward-projecting splitter. Verus Engineering’s splitter support-kit example shows why a part designed for meaningful aero loads can need a dedicated load path. Follow the instructions for the exact product and vehicle. Do not improvise structural attachments or modify safety-related components based on a generic blog post.
5. Separate adhesive trim from mechanically supported parts
Some light trim pieces use automotive attachment tape as part of their intended installation. Others require screws, clips, brackets or a combination. The method depends on the design, projected area and material of both surfaces. For adhesive applications, 3M’s exterior-trim application guidelines discuss tape-land shape, surface preparation and evaluation. They are a useful reference for understanding why an uneven or contaminated contact area is a problem; they are not permission to replace specified mechanical fasteners with tape.
Ask the supplier for the intended adhesive or hardware specification, preparation steps and any temperature or cure requirements. An installer should check whether the original paint, bumper material and clear coat are suitable before bonding.

6. Dry-fit the full width before drilling or finishing
Hold or temporarily fasten the lip in place and check the centerline first. Then compare left and right at the bumper corners, wheel-arch ends, grille opening and lower air intakes. A long component can line up at the center and still sit high on one side. For a three-piece kit, fit all pieces together before finalizing any one of them so the joints can be judged as a set.
Open and close anything near the front assembly that may need service access. Check that the lower engine cover, tow-hook location and jack or transport points remain usable where applicable. Photograph the fit from eye level, low front angle and both sides. If the parts require significant force to meet the bumper, stop and confirm the application rather than pulling them into position with fasteners.
7. Check cooling, sensors and service access
A lip should not casually cover factory air inlets, parking sensors, front cameras or access panels. Some cars also have active aero, brake-cooling ducts or underbody panels near the front edge. Ask whether the product was designed around those features on your exact trim. Check the car’s original configuration, including any front camera or driver-assistance package, before ordering.
Airflow changes are system-specific. Verus Engineering’s air-dam explanation shows that sealing the gap between a bumper and a splitter can affect an engineered package. It also demonstrates why a styling lip photographed on a different bumper should not be assigned the same aerodynamic result.
8. Confirm what “carbon fiber” means for this product
A visible weave does not reveal the complete construction. Ask whether the item is a full carbon composite, carbon laminated over another substrate, or carbon-look plastic. Request the actual material specification, finished weight, rear-face photographs and finish options. Toray describes several carbon-fiber processing routes, including prepreg and sheet-molding compounds. The specific laminate, resin and reinforcement matter more than the marketing term alone.
Carbon fiber can be a strong lightweight material when engineered for the application, but a thin front-edge part is exposed to stones, curbs and ramps. Oak Ridge National Laboratory’s lightweight-materials research frames vehicle mass reduction alongside safety, performance, recyclability and cost. For a road-going lip, fit and damage tolerance deserve as much attention as weight.
9. Decide on finish, weave and repair expectations
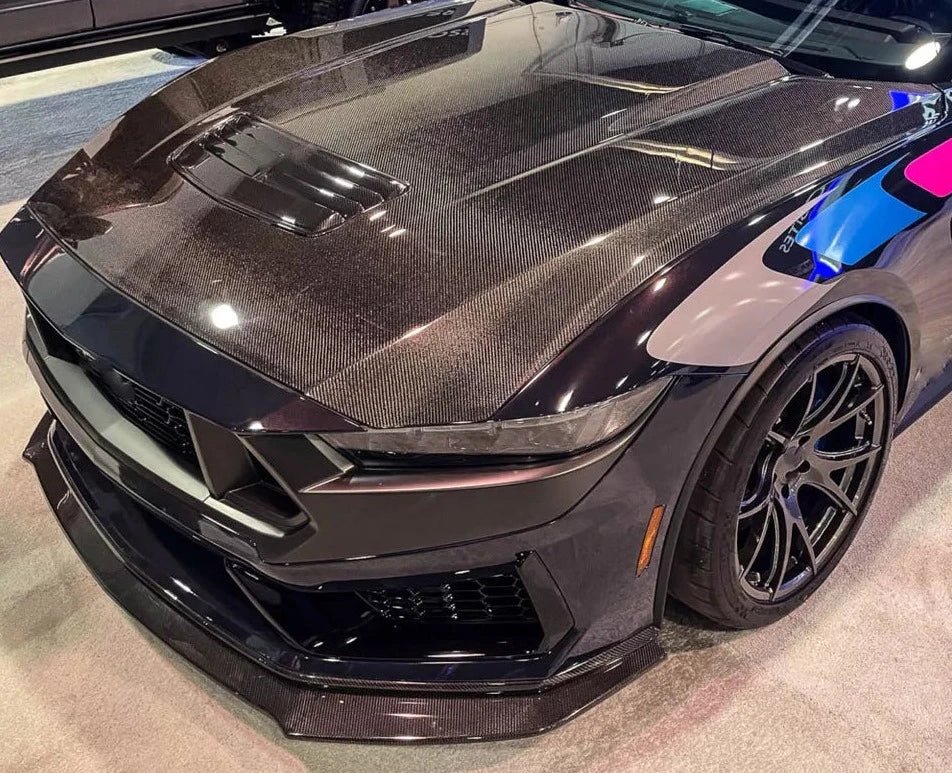
Compare the lip with the hood, mirrors, side skirts and diffuser already on the car. A different weave direction, gloss level or clear-coat tone can be obvious at the front corners. Ask for daylight photographs of the actual product style, not only dark showroom images. Look closely at the leading edge and underside for coating continuity and finished edges.
A scuffed or chipped exposed-carbon finish is not repaired exactly like painted plastic. Discuss clear-coat maintenance and repair options with a qualified composite or body shop. If the car is a daily driver on steep roads, you may prefer a less aggressive projection or a part with replaceable sections. Review our carbon fiber versus fiberglass guide if you are comparing materials rather than only the look.
10. Compare the complete installed cost
Include the part, freight, protective packaging, any applicable import charges, dry fitting, mounting hardware, surface preparation, installation labor and possible repair of the original undertray or bumper. Ask what the seller will do if a confirmed application cannot be aligned without substantial modification. A cheap lip that arrives without brackets or usable instructions may cost more to finish correctly than a better-documented kit.
Material costs are real too. The U.S. Department of Energy describes industry research into lower-cost automotive carbon fiber. That context does not prove a particular retail price is fair; it is a reminder to compare verified construction and included parts instead of judging only the listing price.
Which front-lip material makes sense?
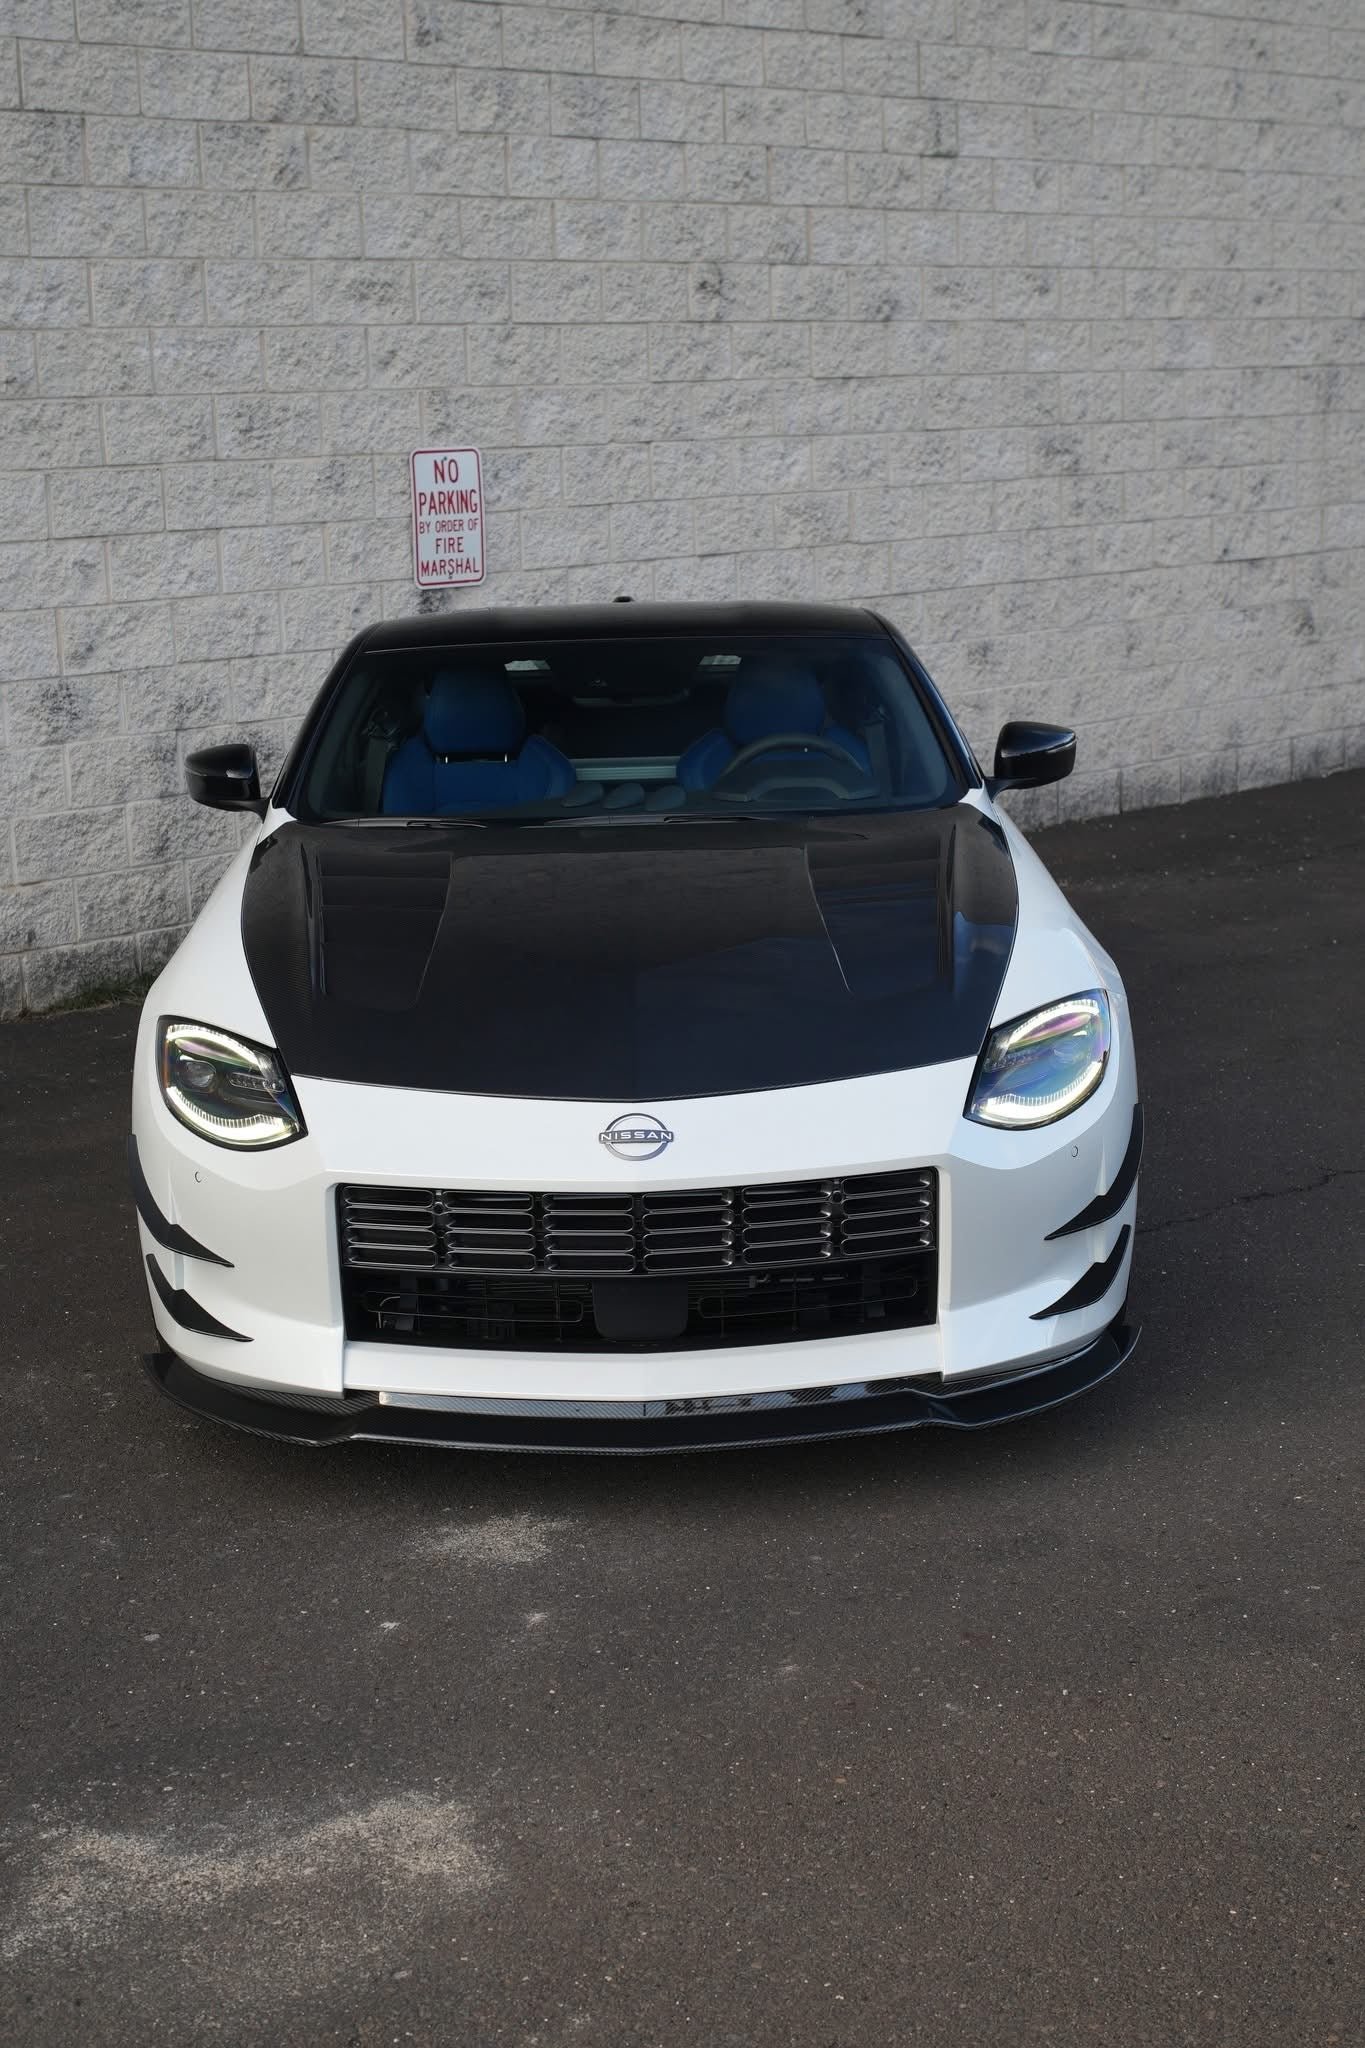
There is no universal winner. Exposed carbon can provide the finish you want with a purpose-built composite construction. Painted plastic may be easier to live with on a very low daily driver. Fiberglass can allow complex shaping but depends heavily on layup and finish quality. The meaningful comparison is between complete parts for the same vehicle and use case, not material names in isolation.
| Priority | What to ask |
|---|---|
| Exposed-carbon appearance | Weave, resin, UV-protective finish and real daylight photos |
| Light weight | Measured finished-part weight, including brackets |
| Daily-road durability | Leading-edge profile, ground clearance and repair options |
| Track use | Product-specific aero data, support design and vehicle balance |
| Easy installation | Detailed instructions, complete hardware and exact bumper compatibility |
How much does a carbon fiber front lip cost to install?
There is no honest single price for every vehicle. A light three-piece styling kit, a full-width lip and a supported track splitter are different jobs. Get a quote that separates the part, freight, mounting hardware, fitment work, finishing and labor. Ask the installer to inspect the exact product page and your bumper before you purchase.
Complete installed cost = product + shipping and applicable import charges + hardware + dry fit + surface preparation + installation + any bumper or undertray work. If the shop needs to drill or alter original components, have it explain the changes before work begins.

Frequently asked questions
Is a carbon fiber front lip the same as a splitter?
No. The names are often used together, but a styling lip and a functional splitter can differ in projection, stiffness, support and aerodynamic validation. Inspect the actual design and instructions rather than relying on the product title.
Will a front lip make my car lower?
It can reduce effective approach clearance, especially when it projects forward. Measure the installed lowest point and overhang for your exact car, wheels and suspension setup.
Can a front lip be installed with tape only?
Only when the manufacturer specifies that method for the exact part and surface. Some trim pieces use automotive tape; more substantial lips and splitters commonly need mechanical support. Do not replace the specified hardware with tape.
Will it add downforce?
Do not assume so. Aerodynamic effect depends on the complete shape, underbody, ride height and mounting. Look for product-specific engineering or test data before claiming a measurable benefit.
What if I have an aftermarket bumper?
Send photographs and the bumper’s brand and part number to the supplier. A lip designed for a factory bumper may not fit an aftermarket one even if both are listed for the same vehicle.
Send this fitment checklist before requesting a quote
- Make, model, year, chassis and trim
- Factory or aftermarket bumper, plus its exact version
- Front-on and low-angle photographs of the lower bumper
- Current ride height, wheel and tire details if lowered
- Present ground clearance and any steep driveway or ramp concern
- Desired one-piece or three-piece style and finish
- Front camera, sensors, cooling openings and undertray configuration
- Delivery country, quantity and intended street or track use
Request a front-lip fitment review with these details, or browse vehicle-specific front lips and splitters. The best choice is the one that fits your exact bumper, survives your actual route and arrives with a clear installation plan.